OverviewEnemies: Kritter, ZingerBonus Rooms: 2 ( 11 and 12) Animal Buddies: Winky Difficulty: Easy  The Stage The StageThis dark cave packs with annoying denizens. It has a slightly elevated challenge compared to the Kongo jungle cave level. And unlike the first cave level, it's not easy to make a speed run here, unless, you're already a skilled DKC player. Oh, Winky's here to help you too, find him and you'll have no problem with the pesky Zingers. GuideYou start in the cave entrance, and look who's there to challenge your jumping ability? Give him a sample. On a distance, is a killer bee guarding a tire, well actually, it's not just the tire. There's also the secret item in that ground. Now, you may wonder why there's a tire in here. What for? Well, if you bring it to the cave entrance and bounce on it, you'll find the answer. After getting the secret item, head to the area guarded by two crazed Kritters. There's the "K" floating in the air, below it are bananas, and another bunch of bananas hidden in the ground. The next area is guarded by a Zinger, steal the bananas when the Zinger's away. Next, pick the barrel that's just up ahead. Then, follow the trail of bananas, bounce on the tires to get the DK Barrel, and move to the area that's guarded by two Zingers. Don't throw the Barrel yet, instead, move into the lower ground and smash the barrel into the right wall. There's also a hidden item in the ground, get it before proceeding to Bonus room #11. From the bonus room, you'll perform one of those stunts you made in the previous cave level. Note that if you go back to the hump, you can obtain a banana bunch from the ground. Ok, now, the "O"s just up ahead, but don't rush or you'll taste the stinger of a Zinger. There's also a tire a few walks away, bring it along with you. As you can see, it has a dual purpose. First, to act as your springboard to reach the Star Barrel, and second, it'll enable you to reach a secret area. So keep moving it, and don't allow it to fall from the edge, instead, wait for the floating platform to descend and move the tire onto it. Use the tire to spring you upwards then move through what seems like a mirage wall. There's also a hidden banana bunch near the wall.  In this secret area, you'll find an "N" guarded by a Zinger. Pass the Zinger, and trample the Kritter (it's guarding something), use Donkey Kong to shake the ground with his powerful Hand Slap, and reveal a banana bunch. The next area has a set of bananas and a DK Barrel, then it's followed by another Kritter guarded area. This one's guarding something too, so dispose of it and get the hidden item from the ground. Jump into the gap but stay on the right to find the hole in the wall. It leads to a secret room, however, it's not counted as one of those bonus rooms, although, the bonus room theme song plays in the background. You'll find Winky here. Hop your way until you get into an area with gaps. You have floating platforms with fixed tires on it, and as an addition to the challenge, a patrolling Zinger. Well, with Winky, you can stomp this pest. Use the tires to bounce your way to another ground. The next area is similar to the last one, but this time, with two Zingers patrolling each platform. The next ground has a fixed tire, and a DK Barrel guarded by another bee. If you move forward, you'll be in an area with one floating platform guarded by two bees. Becareful of this one, Winky may be able to stomp the bees, but, you might lose control and fall straight into the gap.  After crossing over, you'll be in another ground, ahead, is an area with Kritter guards, jumping and patrolling the humps. Note that each ledge contain a banana bunch. Dispose the Kritters, and grab the "G" letter along the way. As you move onward, you'll encounter another Zinger, and a tire, beat the Zinger. You may move the tire onto the floating platform up ahead. However, if you still have Winky, you won't be needing the tire anymore to bounce into the bonus barrel ( Bonus room #12). From the bonus room, you'll land near the exit. There's one hidden banana bunch here, get it before exiting.
 Quick OverviewType: Quick OverviewType: Kremling Immunities: None A reckless kremling who traverses tracks with a mine cart. He loves to crash by colliding his mine cart with the kongs. You must jump from your mine cart to avoid him or you're in for a head-on collision. Krash has no known immunity, but since you'll meet him in a mine cart stage. There is no attack you can launch at him.
OverviewEnemies: KrashBonus Rooms: 0 Animal Buddies: None Difficulty: Average 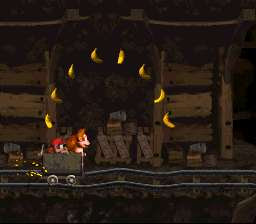 The Stage The StageThis stage poses an elevated challenge. The mine cart riding, as you can see, is not easy. There are enough dangers here to cost you a life. It's fun, but it can make your little sister cry. GuideThere are two ways to play this level: 1. The Hard way, or the 2. Easy way. The hard way is using the regular route, which of course, is long and perilous. The good thing of using this route though is that you can collect items, and the bad thing is that you might die. The easy way, however, is short and it's perfect for speed runs. It can make this level turn out very easy, but in return, you'll miss the fun and the icons. Ok, now let's start the walkthrough, shall we? You start in the mine entrance, as you walk forward, you'll find a DK Barrel and a Cannon Barrel. The Cannon Barrel will launch you into a mine cart, which will immediately run upon riding. This is the regular route. If you wish to use the shortcut, however, you can find it by skipping the Cannon Barrel and jumping into the pit while hugging the wall to the left. A hidden Barrel Cannon will launch you to another cannon, which will launch you upwards. You'll land on a mine cart near the exit. A Krash is waiting for you there. Now, assuming you take the regular route, the risky one.. The key to winning the track course is to know what's ahead, that way, you would be able to prepare for the unexpected. The track begins with a trail of bananas, get them of course. At the end is a gap, don't jump, your cart will leap by itself and land on the next track. There's another gap up ahead, and when you arrive at the spot, jump and grab the "K" letter. The next track has an elevating rail, it will lead upwards then downward followed by a broken rail, which will require you to jump onto the next railway. The next railroad has two ways, one will lead to safety, and one will lead to your doom. Choose the upper track as pointed out by the banana trail. Now, you're in another track. The road up ahead is also broken, grab the 2 bananas as you transfer. Note that the following 2 tracks is short, and you may need to transfer to one after another at moment's notice. At the end of the 2nd short railroad is a curve railway, which will suddenly increase your cart's velocity. Prepare to leap onto another railway that's slightly higher than your ground. After transferring, prepare for another jump as this track's short, and so is the next. On the next track, is a floating "O" letter. Let's make this track as your marker, for now. The track you're on now has an ascending rail, and a banana bunch at the track's end. You can get the banana bunch by timing your jump. First, allow yourself, as if, to fall, then, when you're about to fall, jump! You'll land on another track with a deadly gap at the end. The rail is ascending so your mine cart's speed is reduced, thus, making your next leap a dangerous one. Time your jump this time, and make sure you're on the absolute edge of the track before jumping to the next. After surviving the stunt jump, you will be on the track leading to another gap. You have two choices here, but none may cost you a life. You can either jump and grab the Enguarde token on the floating track, or allow yourself to fall. Falling won't cost you a life as a hidden rail below will catch your cart. Now, you're on your way to the level's half point. Be sure to touch the Star Barrel on the way.  From the Star Barrel, you proceed on the railway with a tipped mine cart at the end. Jump over the mine cart or your buddy is history! You'll land on another rail with another tipped mine cart on the way. Jump over this one too and prepare to jump onto the floating short rail. Make sure to time your jump, and when you land, prepare for another jump in order to transfer to a longer track. Long it may be, but it has two tipped mine carts. One near the beginning of the track, and another at the end. The "N" letter is on the next track, slightly covered by the tipped mine cart. To get it, time your jump by jumping earlier while making sure that you do not touch the other mine cart. Let's make the "N" kong letter as your next marker. From here on, jump over another mine cart. You'll land on a track. Transfer on the floating track found along the way to avoid collision with Krash. There's a floating banana bunch high above the screen on your way. Grab it! Next, jump earlier on the next edge, but make sure you'll reach the other track up ahead. There's a life balloon on the bottom road, but you won't be able to get it if you jump later, as the floating rail will catch you. After nabbing the icons, watch out for a Krash who will crash at you if you don't jump. The next rail has two Krashs on it. The tip of the track is broken, but it won't require you to jump. You'll fall on a safe track, however, your safety is short lived as you may need to transfer to another track to avoid another gap. From this short track, jump onto the next and prepare for a jump as a Krash is at you for a surprise attack. The "G" letter is on the tip of this track. Jump when you get it to avoid the tipped mine cart on the beginning of the next track. Then, on the next following track, prepare for another jump. On another track, follow the trail of bananas to make it to the next floating track, then jump immediately to another. The next straight track is still short, so don't stay in there if you don't want to fall. The next track has a Krash on it, the following tracks are short, the first one is ascending, the second is descending. After passing these tracks, you're back on another one of those long tracks, there are two of those rail-loving Kremlings in here. The next track is short, followed by three short tracks with tipped mine carts on their tips, so time your jumps carefully.  After these tracks, you'll be on the final track. It may look safe but don't let your guard down. A Krash is waiting for you near the exit.
Quick OverviewLocation: Winky's WalkwayItems: 91 Bananas, "N" Kong Letter Walkthrough: Shortly after the star barrel, there is a horizontally flying Necky under a series of bananas and a cannon barrel. Bounce off the Necky into the barrel to transport to the bonus level. 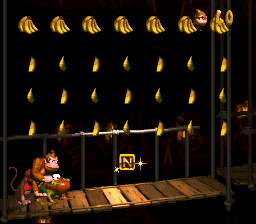 In this room, you can score 91 bananas if you brought Winky with you, and only 21 if you didn't.
OverviewEnemies: Kritter, Gnawty, Necky, ZingerBonus Rooms: 1 ( 10) Animal Buddies: Winky Difficulty: Easy  The Stage The StageThis level takes place on a rickety old scaffolding, high above the mines' floor. It could have been very easy if not for the danger presented by the gaps, which you have to cross in order to transfer from one platform to another. This is also where Dumb Drum shows its first appearance. There are five hidden bunches here too, the first one is in the first elevating walkway, the second is under the Winky crate platform, the third is just below the Star Barrel, the fourth is on a hanging platform next to a horizontal flying Necky, and the final bunch is next to a Dumb Drum near the exit. GuideYou start the walkway and is greeted by a Kritter, greet him back with your Roll/Cartwheel attack then hit the middle of the elevating platform with the Hand Slap. Just up ahead is a floating Necky, follow the trail of bananas and bounce on the Necky's head to get the "K" kong letter. Now get the DK barrel and break it. Thrash the Kritters that gets in your way, and bounce on a Necky to get onto another platform safely.  There are two Neckies on the next platform, and they are guarding a crate that contains Winky the Frog. Bounce on one of the vultures to spring yourself onto the higher platform. Bounce on the crate and free Winky, then take a ride. By the way, just below Winky's platform, is another hidden bunch of bananas. Now getting into the stage's half point should be a breeze, don't forget to grab the "O" kong letter along the way. Touch the Star Barrel when you reach it. Hit the ground below the Star Barrel too for a reward. With Winky's high jumps, reaching heights and long distances won't be a problem. Now get into the next platform and bust the Gnawties. Up ahead, you'll discover that this endless number of Gnawties actually came from a drum. It's Dumb Drum! You can't destroy it, but it can't harm you either, save for the Gnawties it spawns, so just ignore it and proceed on your course. The following platform has a visible Bonus Barrel ( Bonus room #10) that's guarded by a Necky. If you have Winky, you can reach the barrel with your high jump, if not, you can use the Necky to bounce on. The "N" should be in the bonus room. After the bonus, you land near a dumb drum. Ignore it, move to another platform, collect the bananas, and move to the next platform. While on this hanging platform, slap the left edge to get a banana bunch, then bounce on the Necky to transfer to another platform, where an Expresso token can be found. It's guarded by a hyper Zinger, so you need Winky to knock it out of the way. If you do have Winky, simply jump on the wasp, then grab the icon.  Now, on your way, you should see another Necky flying up and down in between the gaps. Use this Necky to reach the "G" kong letter up in the air, but if you have Winky, of course, that won't be necessary. Now, you have to cross over another Gnawty spawning drum, and get into another platform. But before transferring platforms, check Dumb Drum's right with DK's slap. We no need tell you that the next thing you should do is exit the stage.
Overview:Monkey Mines is a medium level world. Most of its stages are caves and mines, and it has one ruins stage. There's plenty of danger with every stage so you have to be alert and observant all throughout this world in order for you to pass it.  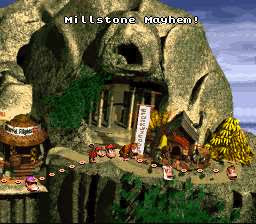
This is the complete list of all the bosses found in Donkey Kong Country. Click on a boss to view its complete information.  Very Gnawty Very Gnawty
OverviewEnemies: Very GnawtyBonus Rooms: 0 Animal Buddies: None Difficulty: Very Easy  The Stage The StageThe enemy on this stage is very easy. Very Gnawty is undoubtedly the easiest boss in Donkey Kong Country. Your reward in this match is a king-sized banana with a Nintendo brand on it. GuideVery Gnawty is a huge Gnawty that hops around to attack. Huge he may be, but he's not really difficult to defeat. However, know that his enormous size makes him impervious to the Roll/Cartwheel, and Hand Slap attacks. The only way to beat him is to bounce on his head. So bounce on him. He will laugh at you, and start hopping again, but know that it's actually working. Give a pause between hits like letting him hop once before bouncing on again because after you hit his weak spot, he will be invincible for a brief period of time. Note that everytime you hit him on the head, he will jump longer so prepare yourself to dodge his attack, then go with the same attack. Keep repeating this pattern to knock him senseless. Piece of cake!
Quick OverviewLocation: Barrel Cannon CanyonItems: 40 Bananas, 1 Red Balloon, 1 Enguarde Token Walkthrough: From the Star Barrel, head right. Along the way, you'll find some Kritters. The entrance to the room is in the left wall of the ledge where the third Kritter stood. Use the DK Barrel or TNT Barrel to blast through.  In this bonus room, you start inside a barrel. At the top each set of bananas are special items. The "right" set of bananas has an Enguarde token at the very end, the "center" has the Red Balloon, while the "left" set holds a banana bunch. Depending on your choice, you may launch at either of these sets, though the best choices would be the Red Balloon or the Enguarde token (center or right set).
Quick OverviewLocation: Barrel Cannon CanyonItems: 14 Bananas, 1 DK Barrel, 1 Red Balloon Walkthrough: In a series of barrel cannons, right after getting the "O" kong letter. Once inside the first of the 3 final cannons, miss the next barrel cannon to punch a hole in the wall.  A purple cave with six vertically positioned barrel cannons. The barrel cannon will start to move up and down once you get inside of it. Just correctly aim for the item on your path and you'll never miss the next barrel.
OverviewEnemies: Kritter, ZingerBonus Rooms: 2 ( 8 and 9) Animal Buddies: None Difficulty: Easy  The Stage The StageThere are only two types of enemies in this stage, the Kritter and the Zinger, but these are enough to cause you problems. The hopping Kritters are annoying, and the Zingers, although they don't attack, impedes your progress by getting in the way, and we do mean it literally. The stage itself poses danger, most of your travels here will be through Barrel Cannons, and you have to brave all the obstacles to pass this one. GuideYou have two paths in this level, the shortcut and the narrow road. Taking the shortcut will allow you to pass most of the dangers of this stage, however, you will miss most of the goodies, while the narrow one will put your skills to the test, but will reward you with plenty of items. For the shortcut, always take the high road to discover hidden Barrel Cannons. These will launch you to safety. Now let's begin your adventure.. We start from the cave. If you climb on top of the cave, you'll find one of those launching barrels. It will catapult you on top of a tree where you'll find another one of the Cannon Barrels. Using it will make you miss the items on the ground though so let's use the ground route. From the cave, move out and kill the Kritters with a Roll/Cartwheel or a Jump attack, move into the Barrel to launch yourself upwards. You can get the "K" on your way up. While on the air, control your descent so you may fall on the patch below. It contains a DK Barrel. Take the low road, and move near the edge of the platform you're on, there's a hidden banana bunch in the ground. Your next move is to perform an Aerial Roll/Cartwheel, and jump with Diddy or Donkey to reach a secret ground at the far right. Move into the barrel to launch yourself back into the high ground while taking the Winky token along the way. Now, enter another launcher barrel to launch yourself to the next ground up ahead. The next area has some Kritters on it. Dispose these reptiles. The next piece of ground has another Kremling guarding a ledge. Bounce on it then move down from the ledge and head left. Use Donkey's Hand Slap to reveal a banana bunch hidden near that ledge and get a move on. Now, you've reached the place where another Barrel Cannon can be found on another ledge. Enter the Cannon, and blast into the floating one up above. It will allow you to grab those unreachable floating bananas. After grabbing all the bananas, propel yourself back to the ground. Now move into the floating barrel cannon by the far end. These barrels will move, but in a slow motion. Time your launch by aiming at the mouth of another barrel cannon. Keep this up until you have successfully crossed over to the other end.  Move on until you reach the spot with the three jumping Kritters. Use a Kritter to bounce on top of the tree. Reveal a Banana bunch with Donkey's powerful hand slap. By the way, the 3 Kritters below are also guarding a hidden banana bunch. Now, move on top of another tree to get the Rambi token, there you'll also find another one of the shortcut barrels. Assuming we take the low route, move to the far end and get into the Cannon Barrels. Don't worry, they still move slow, so it's easy to time your launch. You'll get the "O" in either of the routes. When you arrive at the first of the final three barrels. Miss the Barrel Cannon to hit the wall and break it open into Bonus room #8. You will continue near the Star Barrel. Search the ground here for another banana bunch. It's near the jumping Kritter. Now, touch the midpoint barrel. The following area is composed of a series of up and down grounds infested with jumping Kritters. There's a hidden banana bunch on the spot of the first, third, and fourth Kritter. A secret hole ( bonus room 9) can be revealed by smashing a barrel to the left wall of the ledge where the third Kritter stood. You continue in the spot with the TNT Barrel. Use the TNT barrel to blast the Kritter to kingdom come and get a move on. Cross over to the next ground. There are two jumping Kritters in here and a barrel cannon in between. A banana bunch is hidden just below the barrel cannon. Another shortcut barrel is hidden on top of the tree to the left. This time, we suggest taking the shortcut to save you the trouble that's just up ahead. To reach the treetop, get into the barrel and time your launch in such a way that you avoid the floating barrel and bounce on top of the head of the Kritter. Make sure that the Kritter had jump high enough. The floating barrel that you avoided ought to launch you to a patch hiding the "N", but you can still obtain the "N" using the shortcut.  The shortcut has just save you from a series of obstacles that's harder than the previous ones. It made you skip a series of barrel cannons that offer nothing but a chance of getting acquainted with death. The shortcut barrel will land you on top of a tree where another bunch of bananas is hidden. The ground below has some enemies but they are not difficult to dispose of. Make sure to check the ground too for a bunch of bananas. The hump indicates its position. Now go into the exit point, but do not enter yet, instead, climb onto the treetops, to find the final "G" kong letter. Slap the double tree to reveal another banana bunch, and you're outta here.
 Quick OverviewType: Quick OverviewType: Octopus Immunities: Enguarde's Sword Attack Croctopus is a croc (Kremling) ally octopus-like creature found in some underwater levels of Donkey Kong Country. There are two types of Croctopi found in the game, the blue and the purple ones. The purple croctopus patrols in a fixed pattern, while the blue croctopus give chase, although they usually stop on certain areas of a level. Croctopus has tentacles that are lethal to the kongs, and even Enguarde. The infamous Enguarde sword attack is useless against Croctopus, making this creature totally invulnerable underwater.
 Quick OverviewType: Quick OverviewType: Clam Immunities: Enguarde's Sword Attack Clambo is a clam with eyes and long tongues, found underwater in Donkey Kong Country. They lie on the floor of some underwater levels, sometimes, hidden inside crevices while shooting pearls at the kongs. Clambo is invulnerable to Engaurde's Sword-nose attack, leaving him totally indestructible underwater. Clambo's attack can easily be avoided though as it always has a pattern.
 Quick OverviewType: Quick OverviewType: Shark Immunities: None A small shark, but a shark nonetheless, and as one, they are happy to take a bite at you if you get on their way. Chomps Jr. behaves similarly to Chomps, their bigger counterpart, and like the Chomps, they also have a pattern of movement. Chomps Jr. can't be touched underwater, but he can be dealt with Enguarde's sword-like bill.
 Quick OverviewType: Quick OverviewType: Shark Immunities: None These are large sharks that swim around the submerged levels of Donkey Kong Country. They usually swim back and forth and doesn't seem to attack unless you're in their way. Think of them as the Zingers of the underwater. You can't touch Chomps while swimming so he's practically untouchable while underwater, however, you would be able to get rid of him if you have Enguarde.
 Quick OverviewType: Quick OverviewType: Fish Immunities: None Bitesize is a piranha-like fish that swims some of the treacherous waters of Donkey Kong Country. They don't normally attack the kongs, not unless you touch them. Still, they could act as obstacles underwater. Bitesize has no immunity to any attack, but since there is no Donkey or Diddy Kong attack you can launch at him underwater, he is virtually invincible. You need Enguarde's help to kill bitesize, otherwise, stay away from his path.
OverviewEnemies: Bitesize, Chomps, Chomps Jr., Clambo, Croctopus (Purple) Bonus Rooms: 0 Animal Buddies: Enguarde (x2) Difficulty: Very Easy  The Stage The StageThe underwater theme of this level is perfect for the environment, and the background illuminates the solemnness and tranquility of the bottom floor. This is one marvelous stage. Coral Capers is a cakewalk. However don't underestimate this stage's level of surprise. Swimming recklessly on this waters could sometimes be dangerous as some enemies here are concealed by the camera. Fortunately, you have help from your animal buddy - Enguarde. He's going to make this level very easy for you, not only that, he also appears twice, and that will give you more than enough chances to conquer this level. GuideYou start at the bottom left, and you will see some bananas. Collect them as you move forward but watch out for the incoming bitesize up ahead. Remember, this is a water level and your infamous attacks can't be pulled out, so you better avoid these denizens. As you move on, destroy the DK Barrel to get your buddy, but if you already have him, avoid, so you may save it for later. Return to your progress, go up the vertical shaft, and keep going up even when you reach the right turn. You will be rewarded with the "K" kong letter. Now head to the right, but don't rush, a Croctopus is on the other side, and when he starts his clockwise rotation, let him go by, and then go to the bottom route. Move to the solo banana, and hold DOWN to sink faster through an illusion wall. Your reward are lots of delicious Bananas! Come back through the same route when the Croctopus passes by again. Next, go through the right path, and swim towards the bottom. You won't miss seeing a group of bananas forming an arrow that points downward. Follow the direction to get Enguarde, who's found inside a crate. Now, you can stab the baddies. Go up into the next Croctopus section, and immediately go to the upper right to grab the Red Balloon. Once you got the balloon, go back downwards again as the Croctopus may be heading your way. Let the Croctopus pass and go left and up towards the path with a DK Barrel. By the way, you cannot kill Croctopus so don't charge it. Now, move on, following the trail of bananas, and into an area with the two bitesizes. Kill/avoid these fishes and move forward. Touch the Star barrel and move upwards, but watch out for the Chomps Jr. that's guarding the "O", banana bunch, and banana. Now move down, following the banana arrow. But, once again, don't rush or you're in for a nasty surprise from the Croctopus. By the way, in this same area, another Enguarde crate can be found in the bottom right. Now get a move on towards the next area, kill/avoid the Chomps Jr. and move upwards.  Slow down on your way up, a Chomps is hidden by the camera. Kill the big fish, and move to the right corner of his rally point. Surprise! Another one of those magical walls. It hides bananas, and an Expresso token. Move up to the Expresso token to get it then head to the upper left to pass through another false wall that's guarded by another Chomps. Now move on, and upwards of the vertical shaft until you reach its very end where the "N" kong letter is hidden. Now move down, and right towards another area. You can speed up a little in here, but not so fast or you might end up getting hit by the denizens.  Finally, the final kong letter "G" can be found near the exit. It's guarded by a Croctopus that moves in an "8" pattern. Observe his movements and steal the "G" right under his nose. Now, there is nothing left to do but to exit the stage, so, what are you waiting for? Dash to the exit!
Quick OverviewLocation: Reptile RumbleItems: 34 Bananas Walkthrough: Shortly after the spot where the N is located. You'll come across an area where another stationary tire and a high platform can be found. Use the tire to bounce up to the platform. Then, pick the barrel to the right and carry it. Bring it down from the platform and move to the right. There will be a pit with two Slippas. Throw the barrel into the Slippas and quickly follow it until it smashes into the right wall of the pit. Viola, bonus room #7.  A purple-colored cave level where you can find a tire on a moving floating platform and bananas in the air. Bounce on the tire to get all the bananas. By the way, don't worry about falling, below is a pit, but there's a tire in there that could bounce you back to the top platform. The exit is to the very right of the room.
Quick OverviewLocation: Reptile RumbleItems: 38 Bananas Walkthrough: After the four bouncing Kritters, you'll come along an area with a stationary tire and a high platform with a DK Barrel on it. Bounce on the tire to reach the platform. On the platform, move to the left. The Cannon Barrel that will blast you to Bonus Room #6 is there.  This room has some Cannon Barrels in it. Enter the first Cannon Barrel you'll see and it will do the rest of the work for you. You'll be blasted around the level, getting you all the bananas, and landing you near the exit.
Quick OverviewLocation: Reptile RumbleItems: 10 Bananas, 1 Red Balloon Walkthrough: Just right after the first set of jumping Kritters. Make sure to spare one good barrel by disposing the Kritters found along the way first. Then bring the barrel to the wall mark by the "K" kong letter. Use the barrel to smash the wall open. 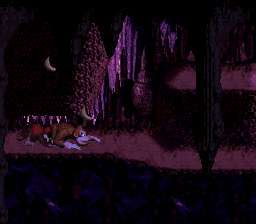 This bonus room occurs in a cave where you need to crawl your way out. Along the way are bananas, and if you crawl fast enough, you would be able to get the Red Life Balloon found in the middle of the level. Finish the bonus level by crawling out of the cave.
 Quick OverviewType: Quick OverviewType: Snake Immunities: None Slippas are the snake denizens of Donkey Kong island. They crawl on the ground and doesn't offer much of a threat as the kongs could easily dispatch them with any attacks. They are usually found inside caves and mines.
OverviewEnemies: Kritter, Slippa, ZingerBonus Rooms: 3 ( 5, 6, and 7) Animal Buddies: None Difficulty: Easy  The Stage The StageThis is the first of the many cave levels you'll encounter in the game. This stage could have been rated very easy if not for those annoying critters that you'll find in this cave. The Kritter seems to have gained a level and can now hop around, putting your jump attack to the test. The annoying slippa (a new adversary) don't prove any challenge, but the Zingers do. These wasps have a pattern of movement that you'll need to observe in order to pass them. Another new installation that has been added to this stage are the tires, they are easy to learn though. GuideYou enter the cave, then throw the barrel at Slippa, check the middle of Slippa's nest with Donkey's Hand Slap. Now move, get the DK barrel and smash it, next, pick up the steel-rimmed barrel, throw it on the hopping Kritters while following it. It should smash into a wall and reveal a secret hole ( Bonus room #5). Before you enter, check the flat ground surface for a hidden bunch of bananas, and get the "K" kong letter along the way. After the bonus room, you return to the level after blasting through a wall, hitting a Kritter, and perfectly land on a tire. But before moving on, check the lump on the ground to the left with Donkey's Hand Slap. Now move on and you'll find another fixed tire along the way. Bounce yourself to the higher ground, slap the middle of that ground, then move to the left edge to find a Cannon Barrel. This will launch you to Bonus room #6.  From the bonus room, you'll land on the same platform. Now move and dispose of the Kritters along the way, and make sure to check the last step as it holds something. Move on, bounce on the tire to get to the next ground. There are Zingers along the way, both guarding a bunch of bananas. These wasps move up and down so wait for them to move up before getting the items. Now grab the "O" kong letter and bounce your way to safety. Now, crawl your way to a series of bananas, then bounce on the tire to move to the high ground. Hit the middle of that ground, then touch the Star Barrel. Now, move down from the higher ground, but watch out of the slippas who may be crawling on the ground below. Move into the tires and avoid a Hyper Zinger by bouncing towards the "N". The Zinger's guarding a hidden bunch of bananas in his platform but don't bother taking it as you'll more likely get yourself hit. Now move onto the next ground, and bounce on another tire to reach the higher ground. Smash the DK barrel, and slap the middle portion of that ground. Pick the barrel and move down from the platform. You'll find two slippas on the lower ground. They seem to be guarding something and they are. Throw the barrel on them and follow it. It'll go straight into the wall and smash it open ( Bonus room #7). From the bonus room exit point, move on. You'll find a Zinger guarding a hole. Time your bounce right to bounce pass. Next, crawl through the small gap and you will be in an area with the jumping Kritters. Bounce on the Kritters to get Enguarde's token, now crawl out of that area.  You'll find more slippas on the next area. Ignore the tire, and kill all the slippas, and check the lumps on the ground. Now, move to a series of tires and bounce all the way up, disposing the Kritters on your way while grabbing the "G" letter. Slap the last step, and move out of the cave.
Quick OverviewLocation: Ropey RampageItems: 1 Red Balloon Walkthrough: Near the end of the level, there is a sign with a red arrow pointing to the right. Just to the left of the sign is a gap. Fall down through the gap to be blasted up into a bonus level.  A rainy outdoor bonus level on the treetops. There are 4 barrels floating in the air here. Inside is a flickering red balloon that transfers from one barrel to another. Stick your eyes on the balloon and try to catch on which barrel it will last appear. Pick the barrel that you think contains it.
Quick OverviewLocation: Ropey RampageItems: 36 Bananas, "N" Kong Letter Walkthrough: After collecting the "O" Kong Letter, allow yourself to fall down through the small gap between the trees to land in a cannon barrel, which will shoot you into the first bonus level.  This bonus level is also a rainy, stormy place. There are six normal ropes in this bonus level, with six bananas going down each rope. There is a ledge at the far right of the area where the "N" can be found. Cling on the rope and use the D. Pad to climb up and down and grab the bananas. Climb high and jump to the next rope to transfer, this should prevent you from missing the next rope. Keep this up til you reach the ledge to the far right where the "N" letter awaits you.
 Quick OverviewType: Quick OverviewType: Wasp Immunities: Stomp/Bounce, Roll/Cartwheel, and Hand Slap Zinger is a wasp, whose body is surrounded by spikes. Therefore, the Kongs have no means of touching them. Zinger can, however, be knocked out by a barrel or a metal keg or better yet, a TNT barrel. Zinger don't usually chase your characters, but they serve as obstacles in the game.
 Quick OverviewType: Quick OverviewType: Armadillo Immunities: When army's rolling, he is invulnerable from Barrel Roll/Cartwheel attacks, and Diddy's stomp attack, although it will cancel army's attack as well. This armadillo first appears in Ropey Rampage stage and proves himself as one of the major annoyances as he can oftentimes throw your heroes off a cliff with his roll attack. He can usually be dispatched with a simple jump or roll/cartwheel attack, but when he rolls, he can bounce off such attacks, although it would cancel his own. Donkey Kong, however, can still stomp him even when he's rolling. The enormous weight of the king of Donkey Kong island is just too much for army.
Quick OverviewLocation: Jungle HijinxItems: Enguarde the Swordfish Token or Expresso the Ostrich Token or Rambi the Rhino Token or Winky the Frog Token Walkthrough: After exiting from the first bonus level, drop down off the tree to the left, and then run right to smash through another wall.  Bonus Room 2 is an outdoor area with three barrels in it. Four animal tokens are flickering inside every barrel. Once you touch a barrel by jumping at it, the item inside stops switching and displays a permanent animal token value. You have to match all three animal token values to get an animal token. The order in all three barrels is: Enguarde, Winky, Expresso, Rambi. So if you want to collect a Winky token, wait until the Enguarde token has just been displayed, then quickly jump up as the token changes.
OverviewEnemies: Army, Kritter, ZingerBonus Rooms: 2 ( 3 and 4) Animal Buddies: None Difficulty: Easy  The Stage The StageThis stage is ranked as easy only (not very easy) due to the fact that the action takes place on top of the trees, and navigating through this environment can not be so easy, not to mention the rain, and the poor visibility of this level. Added to the level's difficulty is the usage of ropes for crossing. Its swaying motion gives room for error, and if you're not yet oriented to this situation, you'll fall to your doom. The denizens on this stage are not so easy to dispose of either. Army's rolling attack could bounce off Diddy to his doom if you're not careful. The zingers are also a pain, they serve as additional obstacle to your rope travels. However, this stage could orient you to some of the basics of gameplay, it is a good training ground to practice on those rope jump timing skills that you may need to master for the more advance stages later in this game. As for the graphics, there is a nice effect near the exit, a sudden transition from rainy/stormy to a calm weather occurs. That's an awesome effect for a 16 bit game. GuideThe first thing to do in this stage is move onto the treetops, once you have move to the end of the ones you can see, do an aerial roll and jump to reach the top of another tree where you'll obtain some banana bunches. From there, jump down and grab the "K" kong letter. Dodge or kill the Army awaiting you at the bottom, move back to the platforms to get the bananas. There is a hidden bunch of bananas in each platform, use Donkey's Hand Slap to reveal it. Now move towards the edge and climb the rope and onto the treetop. Kill/Dodge the army you'll encounter, and use Donkey's Hand Slap on the branches to reveal hidden banana bunches, there's at least three of them. Now, move onto the next ground, climb the rope, and move onto the higher platform. Toss the DK Barrel, and perform another Hand Slap to reveal another bunch of bananas. Move on and you should see a slanting rope. This rope will swing you to and fro once you get on it, use this to grab the Rambi token on top of the tree then allow yourself to fall on the ground below. There is a concealed banana bunch in the middle. Now move on. There's another rope by the ledge, swing yourself to the treetops. These trees also hold concealed items so do the usual Hand Slap technique on these threes. Next, grab the "O" kong letter, and let yourself fall into the small gap in between your tree and the next one, you will land into a Barrel Cannon, which will blast you to a series of bananas and into the secret room ( Bonus room #3). You'll find the "N" on the way out of the room.  From the bonus room, you'll blast through a wall at extreme velocity, hit a Kritter, and land onto a patch, revealing a tire. Move the tire at the root of the tree, kill Army, and use the tire to bring yourself on top of the tree. From this tree, do a ground smash move to destroy the patch below and reveal another one of those glittering animal tokens. Directly below the patch, you can also find a hidden banana bunch. Now move onto the next rope, and be prepared for a stunt. You'll swing through a series of ropes, carefully time your jump in between ropes, and avoid the pacing Zingers on the way. A quick transfer from one rope to another usually works. When you reach the next ground, dispose of the Kritter, and jump into the small gap in between grounds to launch yourself to Bonus room no.4.  From the bonus room, you'll fall from the sky. Now, don't think that the cannon barrel is still on that gap, jumping into it spells instant death. Now go get a move on. Kill the Army on your way, and in case you didn't know, the Army's guarding something underground. Get the floating "G" on top of the tree, move onto another tree, and switch to Diddy. Do an aerial cartwheel then jump onto the unreachable treetop to the left. Move to the next tree, to get another banana bunches. Now, exit the stage.
Quick OverviewLocation: Jungle HijinxItems: 40 Bananas and 1 Red Balloon Walkthrough: After getting Rambi the Rhino, run to the right past the Gnawties, into the next platform, and straight into the wall. 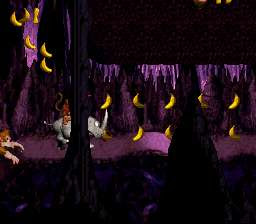 Bonus room number 1 occurs inside a cave. The bananas are positioned along the way towards the exit, while the red balloon is near the exit. You have to move quickly to grab the red balloon or it'll float away.
|


