Overview
Enemies: Kritter, Necky, Zinger
Bonus Rooms: 2 (23 and 24)
Animal Buddies: None
Difficulty: Average
 The Stage
This stage is similar to Vulture Culture, only that this time, you have to deal with ropes. Well, for a monkey that isn't tough right? Wrong! It's tougher than you think. Here, you're pitted up against a dozen of enemies, and while you're on the rope, there's no way you can fight back.
This stage also has one of the hardest bonus rooms to find, in fact, we missed them in about 12 tries.
Guide
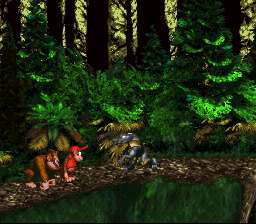
From the tree hole, you're greeted by a grey Kritter who wants to play with you. Play head bounce with the reptilian ruffian to make him play dead. A little farther away is a rope, and it keeps on moving. Time your jump well, and avoid missing the rope or you'll catch up downstream.
The next ground has a hidden bunch to the right, below the platform. You'll also find some happy Kritters. Watch out! They jump real high. Smash the DK Barrel for a kong buddy, then head for another rope, but before that, you might want to get the "K" kong letter below. You can reach it with the old Aerial Roll/Cartwheel and Jump tactic, make sure that the rope is on its way to catch you before doing the stunt or you'll be a dead stunt ape.
The slanting ground has one Kritter, nothing more. Get into the next rope and watch out for the stinger. Jump to the next rope, climb higher, and perform a ground smashing drop on the patch to reveal a DK Barrel, then watch out for the Kritters. We suggest that you roll on them rather than stomping, or if you're too late, you can simply take refuge by hugging the wall and waiting for them to pass. The fools will eventually leap to their doom. Check the higher ground for a banana bunch.
Get into the rope, avoid the bee but grab the "O" at the back of the bee by holding down Y and pressing the Directional Pad either Up or Down base on your location. That should speed up your descent or ascent. The next land mass has two Kritters. Dispose of the nuisance and slap the wall for a banana bunch.
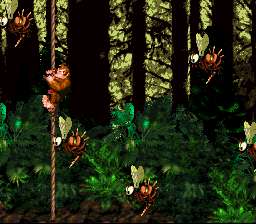 Now, take a ride on the rope and prepare to pass a swarm of Zingers. Take the bigger gaps to have room for your next maneuver. Next stop, the halfway point.
From the halfway point, take a ride on another rope. Follow the trail of bananas into the DK Barrel and into another set of bananas, hop onto the head of a Kritter, and move into another rope. This rope's gonna take you into another swarm of Zingers, this time, the yellow ones, and they aren't the stationary type. To pass the first one, stay low. To pass the second, stay high. Then, stay low, low, high, high, and finally stay low again in order to pass the final yellow Zinger. Hop onto the Kritter's head to throw him out of the land mass, and slap the left edge. Now, bounce on the Necky when it's flying high, and bounce straight onto another Kritter. Transfer to another rope and follow the trail of bananas again. This should also earn you the "N".
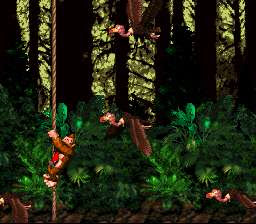
Transfer into another rope, then move using this pattern.. 1st bee-stay low, 2nd bee-stay high, 3rd bee-stay high, 4th bee-stay high, and for the dynamic duo-move to the "G" spot. The balloon guarding Zinger is fast, you can snatch the balloon if you use the fast descent/ascent technique. Stay on the balloon's path until the last second, and immediately move upwards as fast as you can, just as soon as you grab the balloon.
 Now you see two rows of Bananas on top and bottom of the screen, with a Necky in between. Choose one set of Bananas, and then prepare for an onslaught of Neckies. At this point, try to stay near the bottom as there is a Bonus Room coming up, so be on the look out for the top rim of a barrel at the bottom, just let the rope carry you into Bonus Room #23!
When you land, you bust a Steel Rimmed Barrel out of the ground. You should pick it up, and proceed right going underneath the Kritters whenever they jump into the air, or, you may put the barrel down and take them out first. Take the barrel to the last wall to the left, and the wall will crumble to reveal Bonus Room #24! By the way, the top platform marked by the arrow sign has a banana bunch in it. When you come back, just go and exit the level.


